Mastering the Pastels Illustrator Brush-Kit for Authentic Digital Art
Digital illustration often struggles to capture the tactile warmth of traditional media. Many artists spend hours trying to replicate the grainy, soft texture of chalk on paper using standard vector tools, only to end up with flat, sterile lines. This is where a specialized toolset like the Pastels Illustrator Brush-Kit becomes essential. It bridges the gap between the precision of vector graphics and the organic imperfection of hand-drawn pastel art. However, simply downloading a brush pack is not enough. To truly leverage this resource, you must understand how to integrate it into your workflow without falling into common technical and artistic traps.
Understanding the Scope of the Toolset
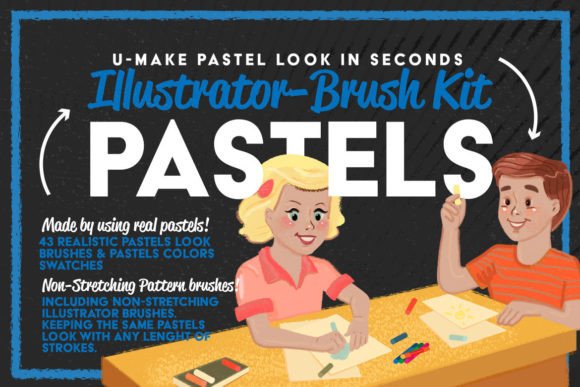
Before diving into creation, it is crucial to recognize what this kit actually offers. This is not just a single brush; it is a comprehensive ecosystem designed for versatility. The set includes 43 realistic pastel look brushes and 25 curated pastel colors organized into five distinct swatch groups. These assets are engineered to work across multiple Adobe environments, including Illustrator CS3 and above, as well as Photoshop CC and CS3.
The variety within the kit addresses different performance needs. For instance, you have access to "Anti-Stretch" brushes for Photoshop, which maintain texture integrity regardless of stroke length, and specific high-performance or low-performance options for Illustrator. Understanding these distinctions is the first step toward avoiding frustration. A common mistake beginners make is assuming all brushes behave identically across different software versions. Using a high-performance stretching brush when a static texture is required can lead to unnatural repetitions in your artwork, breaking the illusion of realism.
Mistake 1: Ignoring Software Compatibility and Version Constraints
One of the most frequent errors users encounter involves compatibility assumptions. While the kit is robust, it is segmented by software capability. The "Pastel Brushes 9 – AntiStrech CC Version" is optimized for modern Photoshop CC workflows, whereas the "Pastel Brushes 10 – Class Painting" is tailored for Illustrator CS3.
Why this matters: If you attempt to load a CC-specific brush into an older CS3 environment, or vice versa, you may experience glitches, missing textures, or complete failure of the brush engine. This wastes valuable design time and can corrupt project files.
The Better Approach: Always verify your Adobe Creative Cloud version before installation. If you are working in Illustrator, stick to the brushes labeled for Illustrator CS3 and above. For Photoshop users, distinguish between the CC and HD (CS3) versions. Keep your software updated to ensure smooth interaction with the brush dynamics, especially if you are using the anti-stretch features that rely on newer rendering engines.
Mistake 2: Overlooking the Power of Included Swatches
Many designers import the brushes but ignore the 25 pastel colors in 5 swatches groups. They instead rely on their default color picker or random online palettes. This is a missed opportunity for cohesion.
Why this matters: Pastel art relies heavily on subtle tonal shifts and harmonious color relationships. Randomly selected colors often clash with the specific grain and opacity settings of the brushes, resulting in muddy or disjointed illustrations. The included swatches were calibrated to work specifically with the transparency and blending modes of these brushes.
The Better Approach: Load the provided swatch groups before you begin sketching. Use these colors as your foundational palette. If you need to expand, sample from these base tones to create variations. This ensures that every stroke, whether it is a bold outline or a soft shading layer, maintains a consistent aesthetic quality. This is particularly vital for projects like children’s book illustrations or comic art, where visual consistency is key to reader engagement.
Mistake 3: Mismanaging Stroke Weight and Pressure Sensitivity
A prevalent issue among new users is treating digital pastel brushes like standard pen tools. They draw with uniform pressure and fixed widths, resulting in stiff, lifeless lines that fail to mimic the physical behavior of pastel sticks.
Why this matters: Real pastels break, crumble, and vary in intensity based on the angle and pressure applied. Digital brushes in this kit are designed to respond to input dynamics. Ignoring pressure sensitivity strips the artwork of its organic feel, making it look like a cheap filter rather than a crafted piece.
The Better Approach: Ensure your tablet’s pressure sensitivity is calibrated correctly. When using the Pastels Illustrator Brush-Kit, vary your stroke speed and pressure. Use lighter touches for atmospheric backgrounds and heavier pressure for focal points. Experiment with the "Stretching High Performance" brushes for long, flowing lines, and switch to the "Class Painting" brushes for textured, short strokes. Adjusting the width and color of strokes dynamically allows you to build depth and realism efficiently.
Mistake 4: Neglecting Installation Protocols
Improper installation can lead to missing assets or corrupted libraries. Some users simply drag files into folders without following the specific instructions for Windows or Mac systems, leading to brushes that do not appear in the panel.
Why this matters: Time spent troubleshooting installation issues is time taken away from creativity. Furthermore, incorrect installation can prevent the brushes from saving properly with your document, causing issues when sharing files with clients or team members.
The Better Approach: Follow the text install instructions carefully. For Windows users, this typically involves opening the Adobe application, navigating to the brush library, and using the "Load Brushes" option rather than manual file dragging. Verify that the brushes appear in your panel and test them on a blank canvas before starting a client project. Keep a backup of the original download in case you need to reinstall after a software update.
Maximizing Value for Professional Projects
The versatility of this kit extends beyond simple sketches. It is suitable for grunge style illustrations, realistic portraits, and vibrant comic art. Designers like Valeriia Domino have demonstrated the potential of these tools, creating stunning previews that highlight the brush's capacity for detail and texture. By studying such examples, you can learn how to layer these brushes effectively.
To get the most out of the Pastels Illustrator Brush-Kit, consider the end use of your artwork. If you are designing for print, ensure your document resolution matches the brush settings. For web-based content, take advantage of the scalable nature of Illustrator vectors, but remember that raster effects in Photoshop brushes may require higher resolution settings to avoid pixelation.
In conclusion, this brush kit is a powerful asset for any digital artist looking to inject warmth and texture into their work. By respecting compatibility constraints, utilizing the curated color swatches, mastering pressure dynamics, and following proper installation procedures, you can avoid common pitfalls and elevate your digital illustrations. Whether you are a freelancer creating marketing materials, an educator developing visual aids, or a hobbyist exploring new styles, these tools offer a professional pathway to authentic pastel aesthetics.