Mastering Digital Painting: Integrating a Watercolour Brush Set for Procreate into Your Creative Workflow
Digital illustration has evolved significantly, moving beyond flat vectors and hard-edged pixels to emulate the organic unpredictability of traditional media. For professionals and hobbyists alike, the transition to digital tools often hinges on finding assets that replicate the tactile feel of physical materials. A high-quality Watercolour Brush Set for Procreate serves as a critical bridge in this process, allowing artists to leverage the convenience of digital editing while maintaining the aesthetic warmth of hand-painted art. This article explores how to effectively integrate these tools into your existing creative pipeline, ensuring that technology enhances rather than hinders your artistic expression.
Understanding the Role of Digital Watercolours in Modern Design
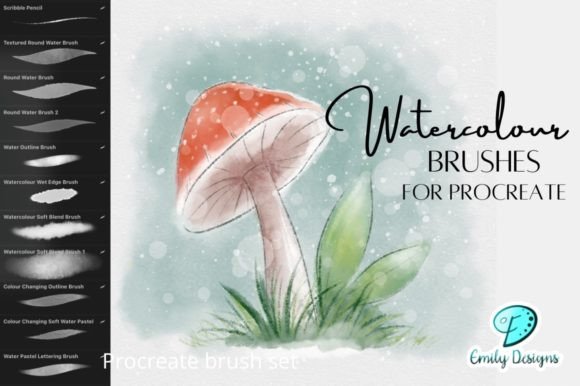
Watercolour is traditionally associated with spontaneity and fluidity. In a digital environment, replicating this requires more than just a brush that looks like watercolour; it demands a system that mimics the behavior of water, pigment, and paper interaction. The specific pack containing 17 different watercolour brushes and three paper textures is designed to address these nuances. It is not merely a collection of stamps but a toolkit for building layers, controlling saturation, and managing edge hardness.
For marketers, educators, and content creators, this toolset fits into a broader strategy of visual storytelling. Unlike rigid corporate graphics, watercolour elements convey approachability, creativity, and human touch. When planning a brand identity or an educational resource, deciding to use digital watercolours is a strategic choice that influences the subsequent workflow. It requires a shift from precise, grid-based design thinking to a more organic, layer-based approach.
Preparation and Setup: Laying the Foundation
Successful implementation begins before you make the first stroke. Integrating a new brush set requires understanding its components and how they interact with your iPad’s settings. The inclusion of three different watercolour paper textures is a vital feature that many users overlook initially. These textures are not just background images; they are functional layers that affect how the pigment brushes behave.
- Texture Selection: Choose a texture that matches the mood of your project. Rougher textures create more granulation, suitable for rustic or natural themes, while smoother textures allow for cleaner washes, ideal for modern, minimalist designs.
- Canvas Configuration: Ensure your canvas resolution is high enough to support the detail of the brushes. A minimum of 300 DPI is recommended for print-ready work, while 72–150 DPI may suffice for web-only content.
- Layer Organization: Plan your layer structure. Digital watercolour relies heavily on blending modes. Set up base layers for washes, mid-layers for details, and top layers for highlights or corrections.
By preparing your workspace thoughtfully, you reduce friction during the creative process. This preparation phase is crucial for freelancers and small business owners who need to maintain efficiency without sacrificing quality. Knowing exactly which texture complements which brush allows for faster decision-making during execution.
Execution: Techniques for Realistic Results
Once the setup is complete, the actual painting process involves mastering the interplay between the 17 brushes. Each brush in the set likely serves a specific function, such as wet-on-wet blending, dry brushing, or splattering. Understanding when to use each tool is key to achieving a professional outcome.
Building Depth Through Layering
Traditional watercolour builds depth through transparency. In Procreate, you can mimic this by adjusting layer opacity and using specific blending modes like "Multiply" or "Linear Burn." Start with light, broad washes using the softer brushes in the set. Allow these layers to dry digitally—meaning, finalize the shape and opacity—before adding darker, more defined strokes. This method prevents the muddy appearance that often plagues amateur digital paintings.
Utilizing Texture for Authenticity
The three included paper textures should be used actively, not passively. Place the texture layer above your painting layer and set its blending mode to "Overlay" or "Soft Light." This interaction adds grain and irregularity to your digital strokes, breaking up the perfect uniformity of pixels. For entrepreneurs creating product packaging or book covers, this subtle imperfection adds perceived value and authenticity to the final asset.
Controlling Water Flow
One of the challenges in digital watercolour is controlling the "flow" of paint. Use the pressure sensitivity of your Apple Pencil to vary the opacity and size of your strokes. Lighter pressure creates translucent, watery effects, while heavier pressure deposits more pigment. Practice transitioning between these pressures within a single stroke to create natural gradients. This skill is essential for educators creating engaging visual aids, where clear yet soft distinctions between elements are necessary.
Integration with Other Tools and Workflows
A Watercolour Brush Set for Procreate does not exist in isolation. It interacts with various other tools and platforms in a professional workflow. For instance, a blogger might create watercolour headers in Procreate and then import them into Canva or Adobe InDesign for text overlay. A marketer might use these brushes to create unique social media backgrounds that stand out from stock photography.
Compatibility is straightforward since Procreate files (.procreate) can be exported as PNGs with transparent backgrounds or PSDs for further editing in desktop software. This flexibility allows for a hybrid workflow where the organic painting happens on the iPad, and precise typography or layout adjustments occur on a computer. For publishers and freelancers, this division of labor maximizes the strengths of each platform.
Furthermore, these brushes can be combined with other digital assets. You might scan traditional sketches, import them into Procreate, and color them using the watercolour set. This hybrid approach appeals to artists who want to retain their traditional sketching habits while benefiting from digital coloring efficiencies. It also facilitates collaboration, as team members can share layered files and adjust individual elements without redoing the entire piece.
Quality Control and Consistency
Maintaining consistency across multiple projects is a common challenge when using organic brushes. Unlike vector shapes, watercolour strokes are inherently variable. To ensure brand consistency, create a palette of standard colors and save them in Procreate’s palette library. Limit your selection of brushes to a core subset of the 17 available for recurring projects. This restriction helps develop a recognizable style.
Regularly review your output against your initial goals. Does the texture enhance readability? Is the color saturation appropriate for the intended medium? For business owners, this quality control step is vital. A beautiful illustration that fails to communicate the message clearly is ineffective. Adjust the opacity of your texture layers or the intensity of your brushes to ensure the artwork supports, rather than distracts from, the content.
Long-Term Value and Skill Development
Investing in a specialized brush set is not just about immediate results; it is about long-term skill development. Mastering these 17 brushes takes time and practice. As you become more familiar with their behaviors, you will develop shortcuts and techniques that speed up your workflow. This proficiency translates to higher productivity and the ability to take on more complex projects.
For educators and content creators, this mastery allows for the rapid production of custom visuals. Instead of relying on generic clipart, you can create bespoke illustrations that align perfectly with your teaching materials or brand narrative. Over time, the cost of the brush set is amortized across hundreds of unique assets, providing significant return on investment.
In conclusion, a Watercolour Brush Set for Procreate is a powerful tool for anyone looking to add organic warmth to their digital work. By understanding its components, preparing your workspace, and integrating it into a broader creative workflow, you can achieve professional, authentic results. Whether you are a freelancer, entrepreneur, or hobbyist, the key lies in deliberate practice and thoughtful application. Embrace the unpredictability of the medium, control it through layering and texture, and let it enhance your unique visual voice.